
How to Use Lane Codes to Save Customer Routes in Axle Flow
For customers who regularly run the same routes, Axle Flow allows you to create saved lanes with custom lane codes. This simplifies load creation and ensures consistency in billing and documentation.
Video on Lane Codes
What Is a Lane Code?
A Lane Code is an internal or customer-specific identifier for a regular route. Each saved lane stores:
- Origin and destination details
- Distance
- Default rate
- Optional lane code for internal tracking or customer invoicing
How to Create Saved Lanes with Lane Codes
- Go to Customers and navigate to the customer profile (e.g. FedEx).
- Open the ‘Lanes’ tab and click New Lane.
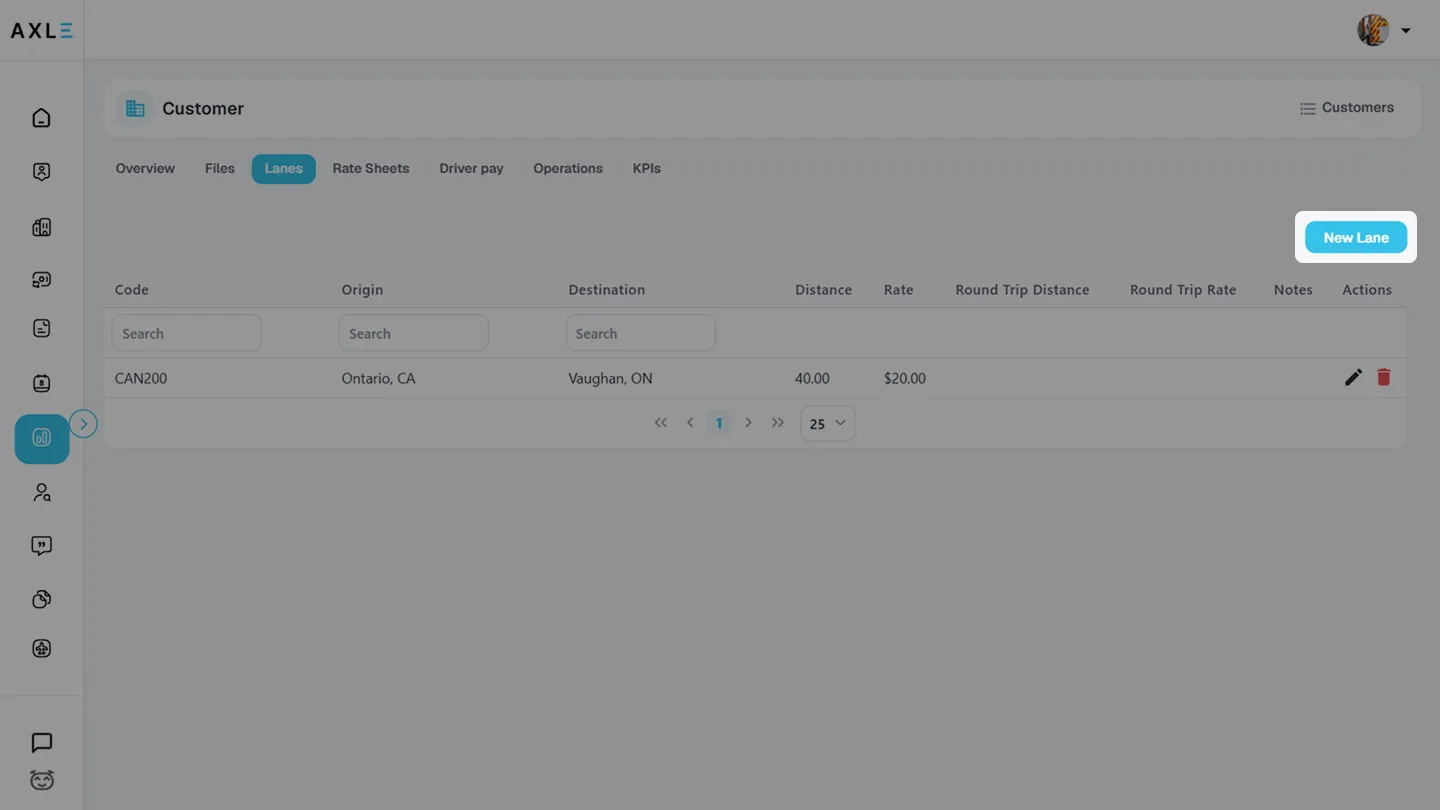
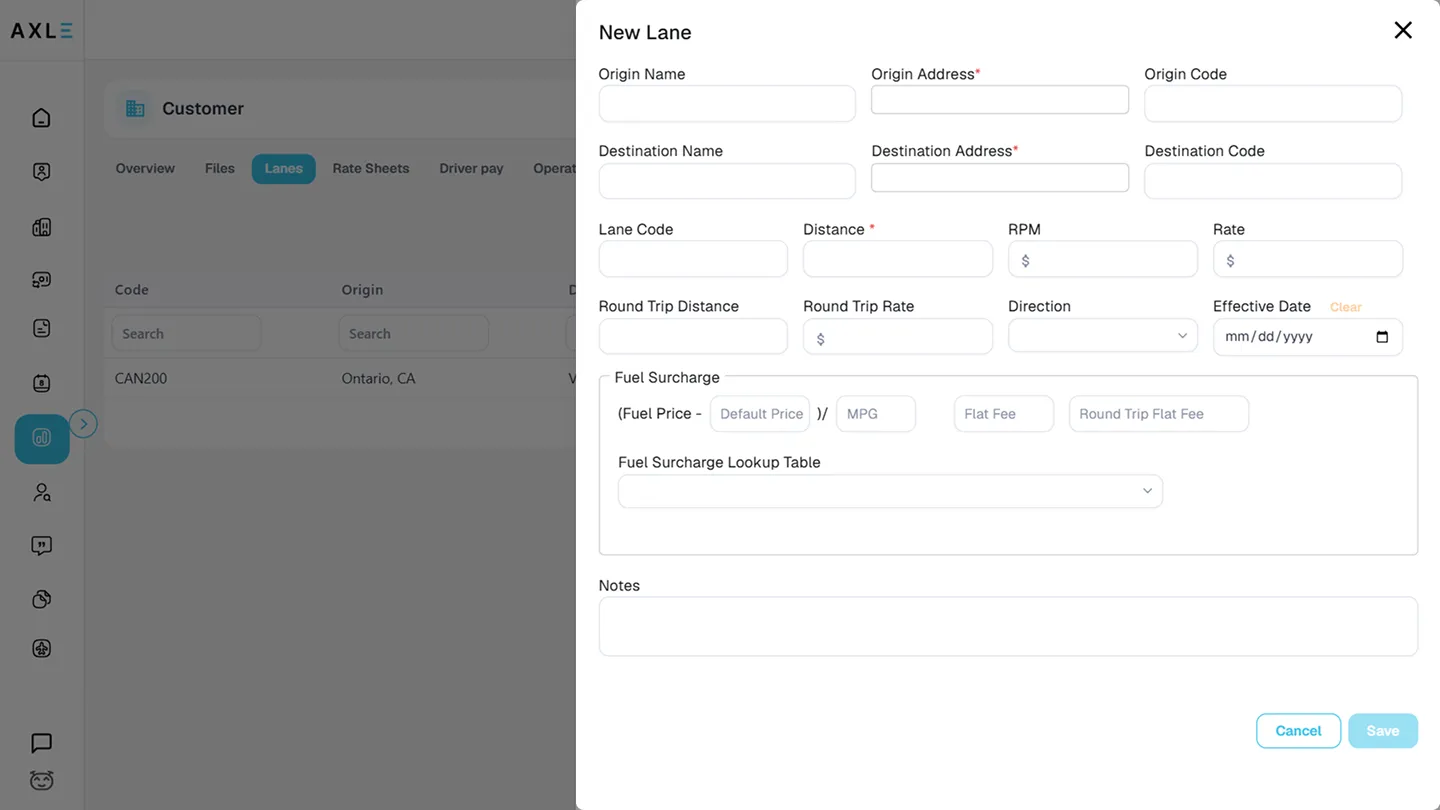
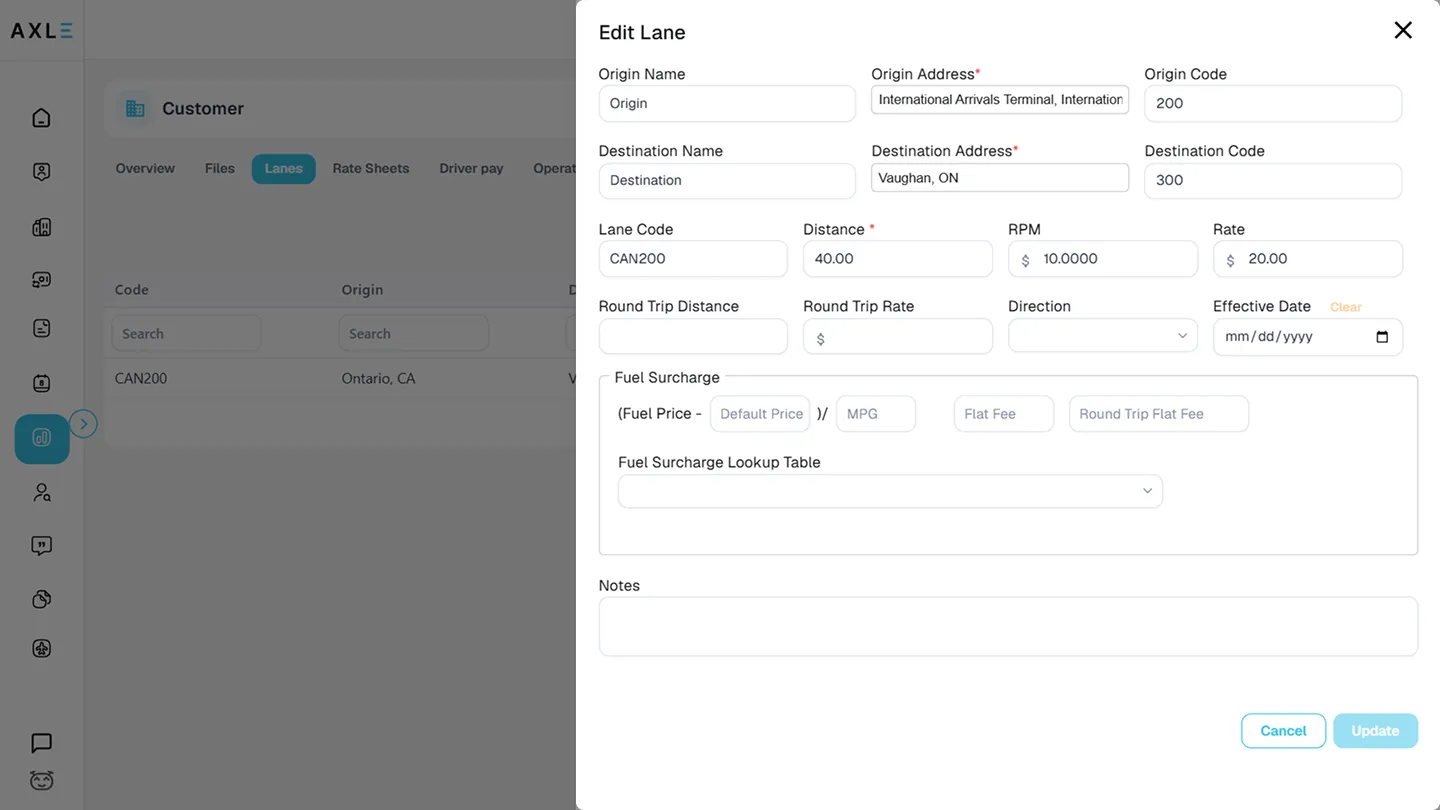
- Enter the lane details:
- Origin and Destination addresses
- Distance
- Default rate
- Lane Code — Use this if the customer has a specific identifier for the route (e.g. “NYC-LAX-001”).
Using Saved Lanes in Dispatch
When creating a load for that customer:
- Go to Dispatch > New Load
- Select the Customer
- In Step 1, you’ll see a section called Customer Lanes.
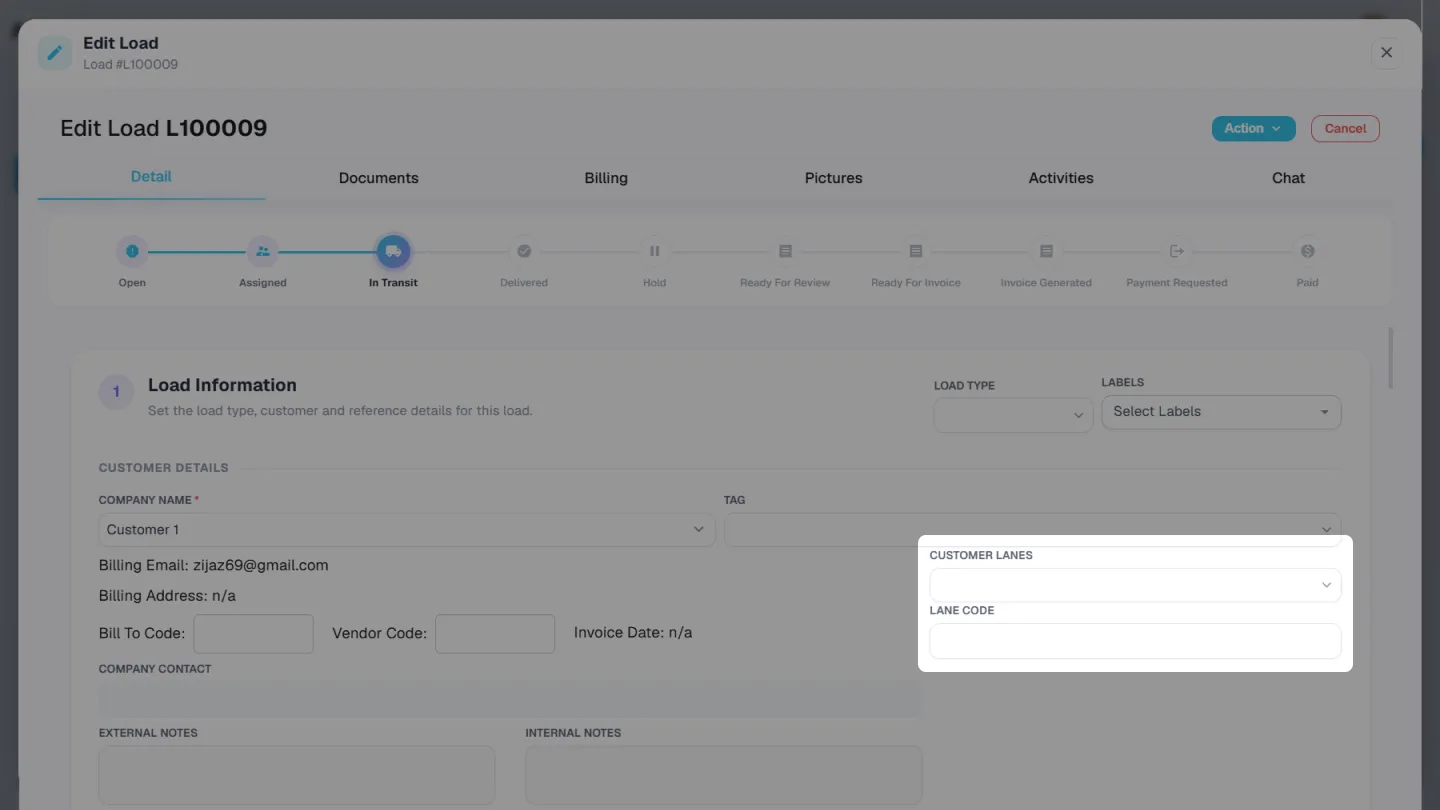
- Pick from the dropdown list of saved lanes.
Note: Typing the lane code manually will not auto-fill route data. You must select the lane from the dropdown.
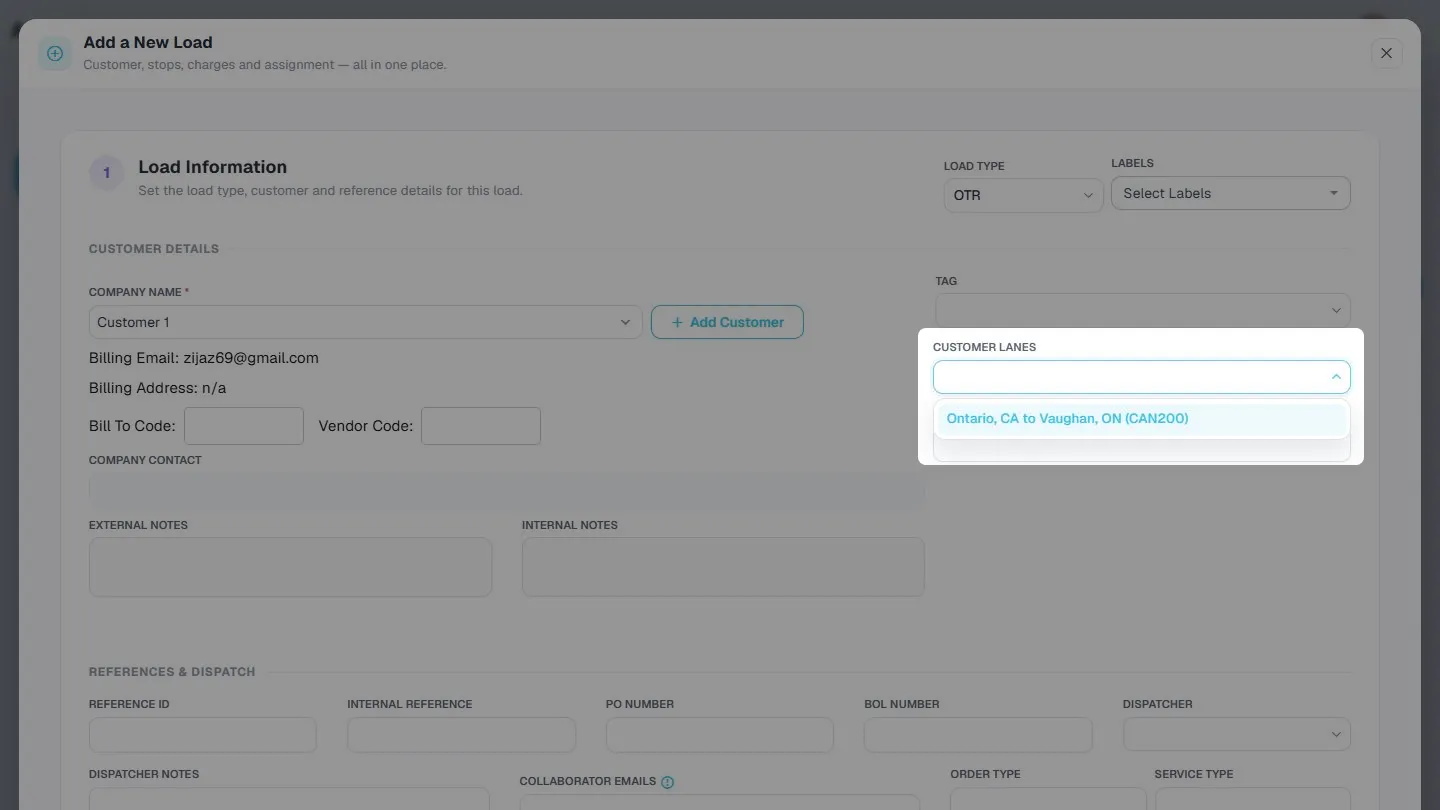
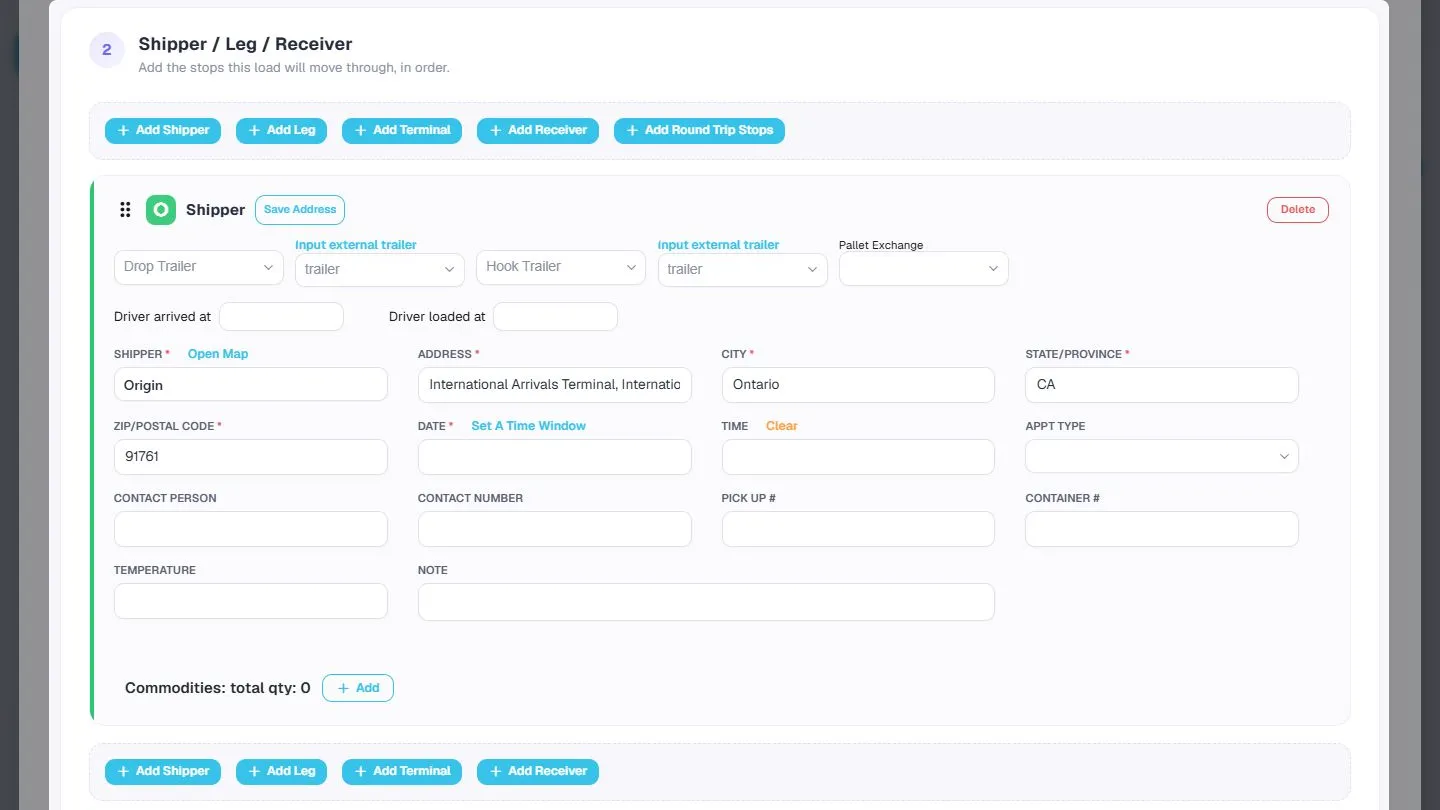
Once selected, the system will:
- Auto-fill the shipper and receiver information
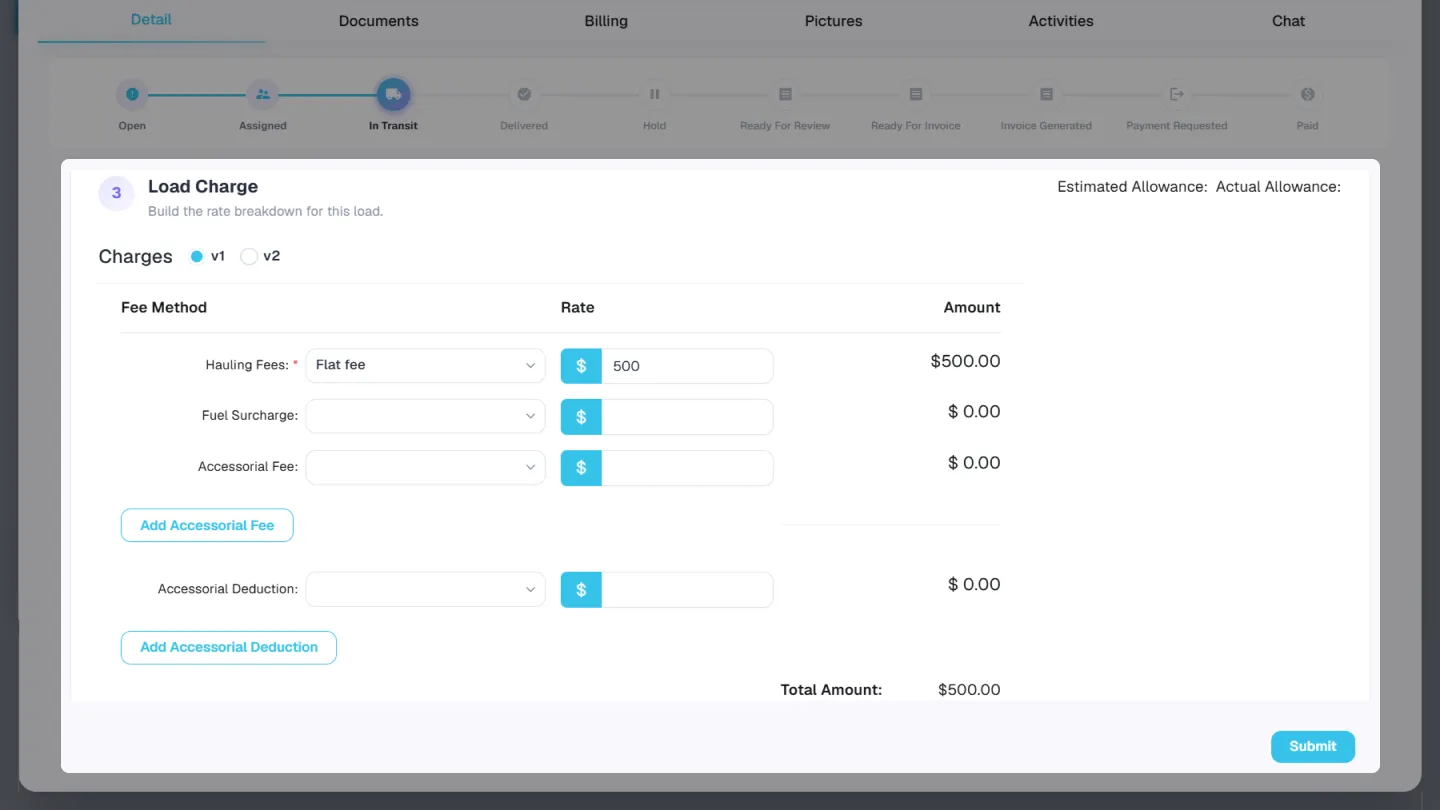
- Pull in the saved rate
- Reduce repetitive entry
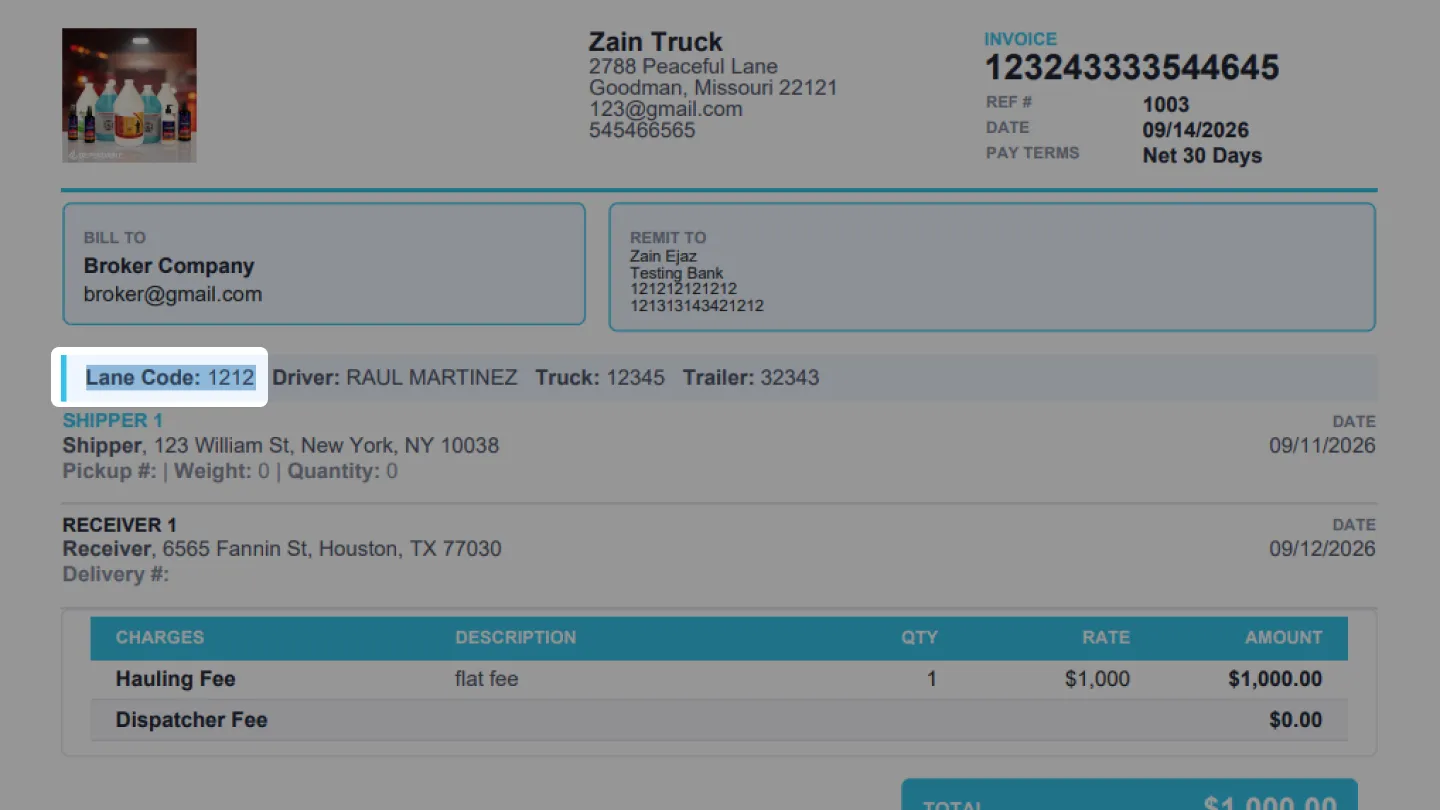
Where Does the Lane Code Appear?
If a lane code is assigned, it will:
- Be visible in the load details
- Appear on the invoice for that load, which is helpful for customer references
When Should I Use Lane Codes?
Use lane codes if:
- Your customer has their own internal lane identifiers
- You want to standardize routing entries
- You need the lane information to show up on invoices for billing purposes
For any questions or support, reach out to us at help@Axle Flow.io